Welcome, brave (or bovine-obsessed) adventurer. The Cow Level in Diablo IV is a legendary secret wrapped in a riddle, shoved inside a quest chain, and sprinkled with ridiculous requirements. To open it you need three special items from three different hidden quests: one tucked into the base game, one in the Vessel of Hatred content, and one in Lord of Hatred. Do them in the wrong order or miss a step and poof—no cows for you.
What you need before you start
In plain terms, you must collect three quest items and stash them in a chest so you can transmute them later in the Horadric Cube. The three pieces are: the Potion of Endurance (from the base-game secret quest), the Rusted Bardiche (from the Vessel of Hatred secret quest), and Neyrelle’s Hand (from the Lord of Hatred secret quest). Get all three, toss them in the cube on Skovos Island, and you’ll be one transmute away from the Trophy of the Faithful — which is the final key to the cows.
First hidden quest: Potion of Endurance (base game)
Step 1: Head to Ked Bardu’s fountain in the Barren Steppes. There are bovine statues around it. Interact with the east statue to trigger the first clue—yes, the game wants you to be weird and murdery toward farm animals. The lore hint points you to a blood-related tribute that ends up spawning special drops if you meet exact counters.
Step 2: Cow grinding. You’ll need to slaughter a series of cow kills distributed across characters: the game tracks a per-character counter that caps at 666, so most players use multiple characters to avoid waiting for resets. You must hit exact counts in certain areas or the relic you want won’t drop. The general idea: farm cows in the regions tied to each relic, respawn them by changing zone or world difficulty, and repeat until you have the three relics tied to this hidden quest.
Step 3: Purify and open the cursed hut. Return to the Ked Bardu fountain and offer each relic in the water; doing so will activate the other statues and eventually yield an Unusual Key. Use that key on a locked cellar door near the skull-shaped map area east of Scosglen, clear the cows inside, and the Potion of Endurance (sometimes shown as a Potion of Stamina in older notes) will drop.
Second hidden quest: Rusted Bardiche (Vessel of Hatred)
This one is more of a scavenger hunt with odd activities. You need three items: the Rusted Bell, the Chattering Gem, and the Twisted Staff. Gather three scrolls that give cryptic clues, then follow the instructions the scrolls hint at.
Step 1: Find the Scrolls of Uacax. They appear in specific buildings and locations and point you to the places where the relics hide. Read them; the clues are weird but useful.
Step 2: Rusted Bell at the 12 bird statues. There’s a bird-statue route east of Samuk. Follow a precise order (don’t get too close to the wrong statue) and the bell will spawn at the end if you perform the sequence correctly. If you mess up, start the route over.
Step 3: Chattering Gem in Kurast tombs. In a shrine south of the Kurast docks you’ll find three tombstones. Use the Thank You emote on them in the specific order the scroll hints at (center, then north, then south) while facing each stone—do it perfectly and the gem appears.
Step 4: Twisted Staff from Blood Ray. This is the tricky combat test. Locate the named Super Elite (Blood Ray) and beat it without using any active skills—basic attacks only. Lower difficulty if needed, unequip skill-boosting runes, ditch mercenaries, and be patient: it’s slow but doable. The reward is the Twisted Staff.
Step 5: Corrupt the relics. In Nahantu’s Field of Giants you need to kill three Cordyceps Zombies at the same time and place each relic on the black mushrooms that spawn. When they pulse with a dark aura, pick them up—the relics are now corrupted.
Step 6: Temple offering and the Cursed Burrow. At the Kurast Bazaar offer the corrupted relics at the three braziers near the entrance. That will spawn another Unusual Key. Use it in the Cursed Burrow west of the Bazaar, clear the basement of cows, and the Rusted Bardiche should drop.
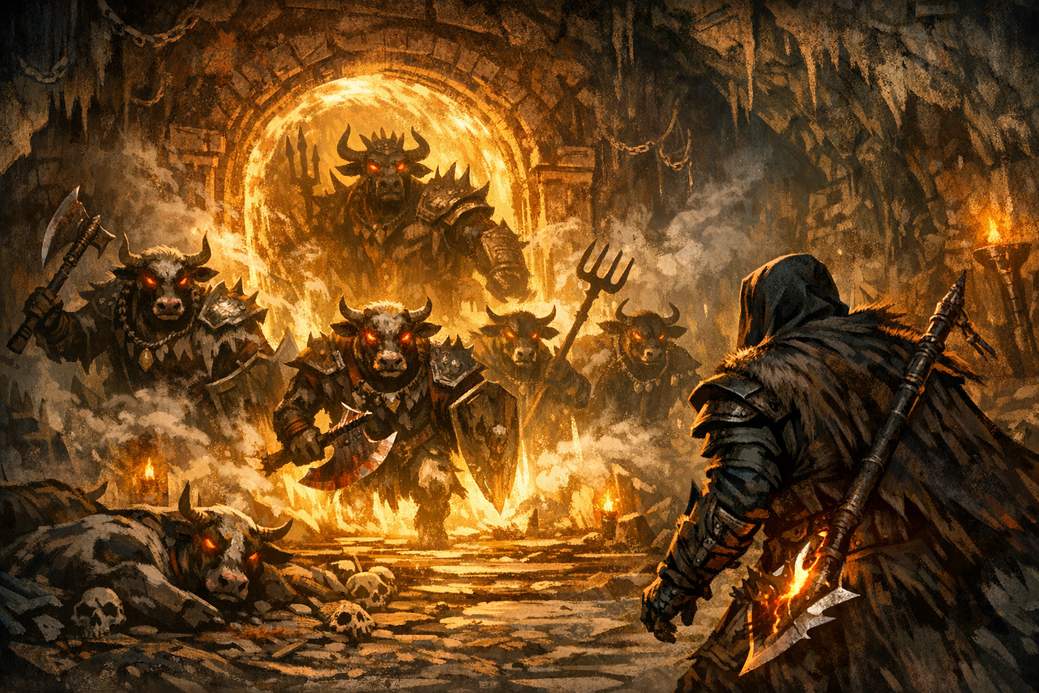
Third hidden quest: Neyrelle’s Hand (Lord of Hatred)
This one is the longest, most fiddly chase and requires you to have finished the Lord of Hatred campaign and learned fishing. There’s no strict sequence for every step, but it helps to take notes and go slowly.
Step 1: Outcast’s Journal and early clues. Interact with the journal on Mount Hefaetrus and then visit the Gate of Kyovashad altar actions it points to. The journal text will change as you flip switches in the world—these little interactions unlock the next breadcrumbs.
Step 2: Amazon bolt and ballista. Destroy a ballista at Akarat Fortress to collect Amazon’s Bolts, then use one at a crossbow near Idyllic Reach to fire a bolt and create a rope bridge—yes, the game asks you to be an Amazon for a hot minute.
Step 3: Statue challenge and Father’s Chains. Activate the Inarius statue in the new area to spawn an Angel Jailer, defeat it, and pick up the Father’s Chains. Burn the chains at the named location to progress the journal’s dialog.
Step 4: Collect Amazon armor. You’ll need to farm several Amazon gear pieces: helmet, tunic, pants, gauntlets, and boots. Equip the full set, track down the elite Captain southeast of Akarat Fortress to get the Mother’s Rose, and then burn that on the pyre at the Temple of Athulua. After that, you can swap your usual gear back in.
Step 5: Follow the raven for the Hierophant’s Skull. Dismiss mercenaries, trigger the statue option marked “fear” in Kyovashad, then head to Lycander Island’s Ruins of Broken Reason. Find the big raven, follow it carefully (it can fly into awkward spots), and it will drop the Hierophant’s Skull when you keep up with it. Use the skull to interact with the Signal Brazier at the Temple of Life to earn the Hadopelagic Key.
Step 6: Fish for a coffin and grab Neyrelle’s Hand. Go to Hawezar’s Squeaking Wrecks where the map looks vaguely like a bull. Fish on the wooden platform until you pull up a locked coffin. Open it with the Hadopelagic Key and you’ll be warped into a small temple sequence. Keep moving until you reach the altar—Neyrelle’s Hand is hidden in mist and will reveal itself if you move around the altar until the fog clears. Congratulations: with this item in your chest you now have all three relics.
Use the Horadric Cube and go find the cows
Take the three items (Potion of Endurance, Rusted Bardiche, Neyrelle’s Hand) to the Horadric Cube on Skovos Island. Put them in and transmute. You’ll get the Trophy of the Faithful and a torn page that unlocks the final hint. Equip that torn page and follow its directions to Philios Island’s Shore of Zerae.
There’s a little boat waiting. Ride it until you reach an off-map island (Cow Island) that doesn’t show on your usual world map. Search around the island for a basement, go down, clear the staring cows around the central mural, and a portal will open to the actual Cow Level.
Inside you’ll meet armed bovines, a handful of quirky events, and the Cow King himself. He’s a meme-y boss—fun to kill and likely to drop the Cow King’s Crown. You’ll also earn the MOO title and the MOO emote. That’s it: the myth is real, the cows are proud, and now you can brag about slaying them.
Final tips and cheeky advice
Keep a chest reserved for the three relics and don’t accidentally spend or sell them. Use alternate characters or world-difficulty swaps to speed cow-farming and don’t be afraid to lower difficulty for the skillless fight or tough encounters. Above all, bring snacks—this secret quest chain is long, silly, and deeply satisfying when you finally hear the bovine moo.